About Panel System
This section describes how to customize your workspace layout using panels, tabs, and docking features.
The program functionality is distributed between the panels which can be arranged and docked to create a workspace that suits your workflow.
Docking Panels
- Drag and Drop: Click and hold on a panel’s title bar and drag it to a different location within the UI. You can drop it onto:
Another panel: Create a split workspace.

A window: Dock the panel within a separate window.
A docking icon: Split the workspace into multiple sections.
- Panel Menu: Use the Panels menu to:
Create a new panel.
Access existing panels.
Add Panel Button: Click the Add Panel (
 icon) button to create a new panel.
You can customize your workspace layout by moving, docking, and hiding panels.
Move and Dock: Click and hold on a panel’s title bar and drag it to a new location. You can drop it onto another panel, window, or a docking icon to create a new workspace division. You can also use the Panels menu to create or access panels. Click the Add Panel (
 icon) button to create a new panel.
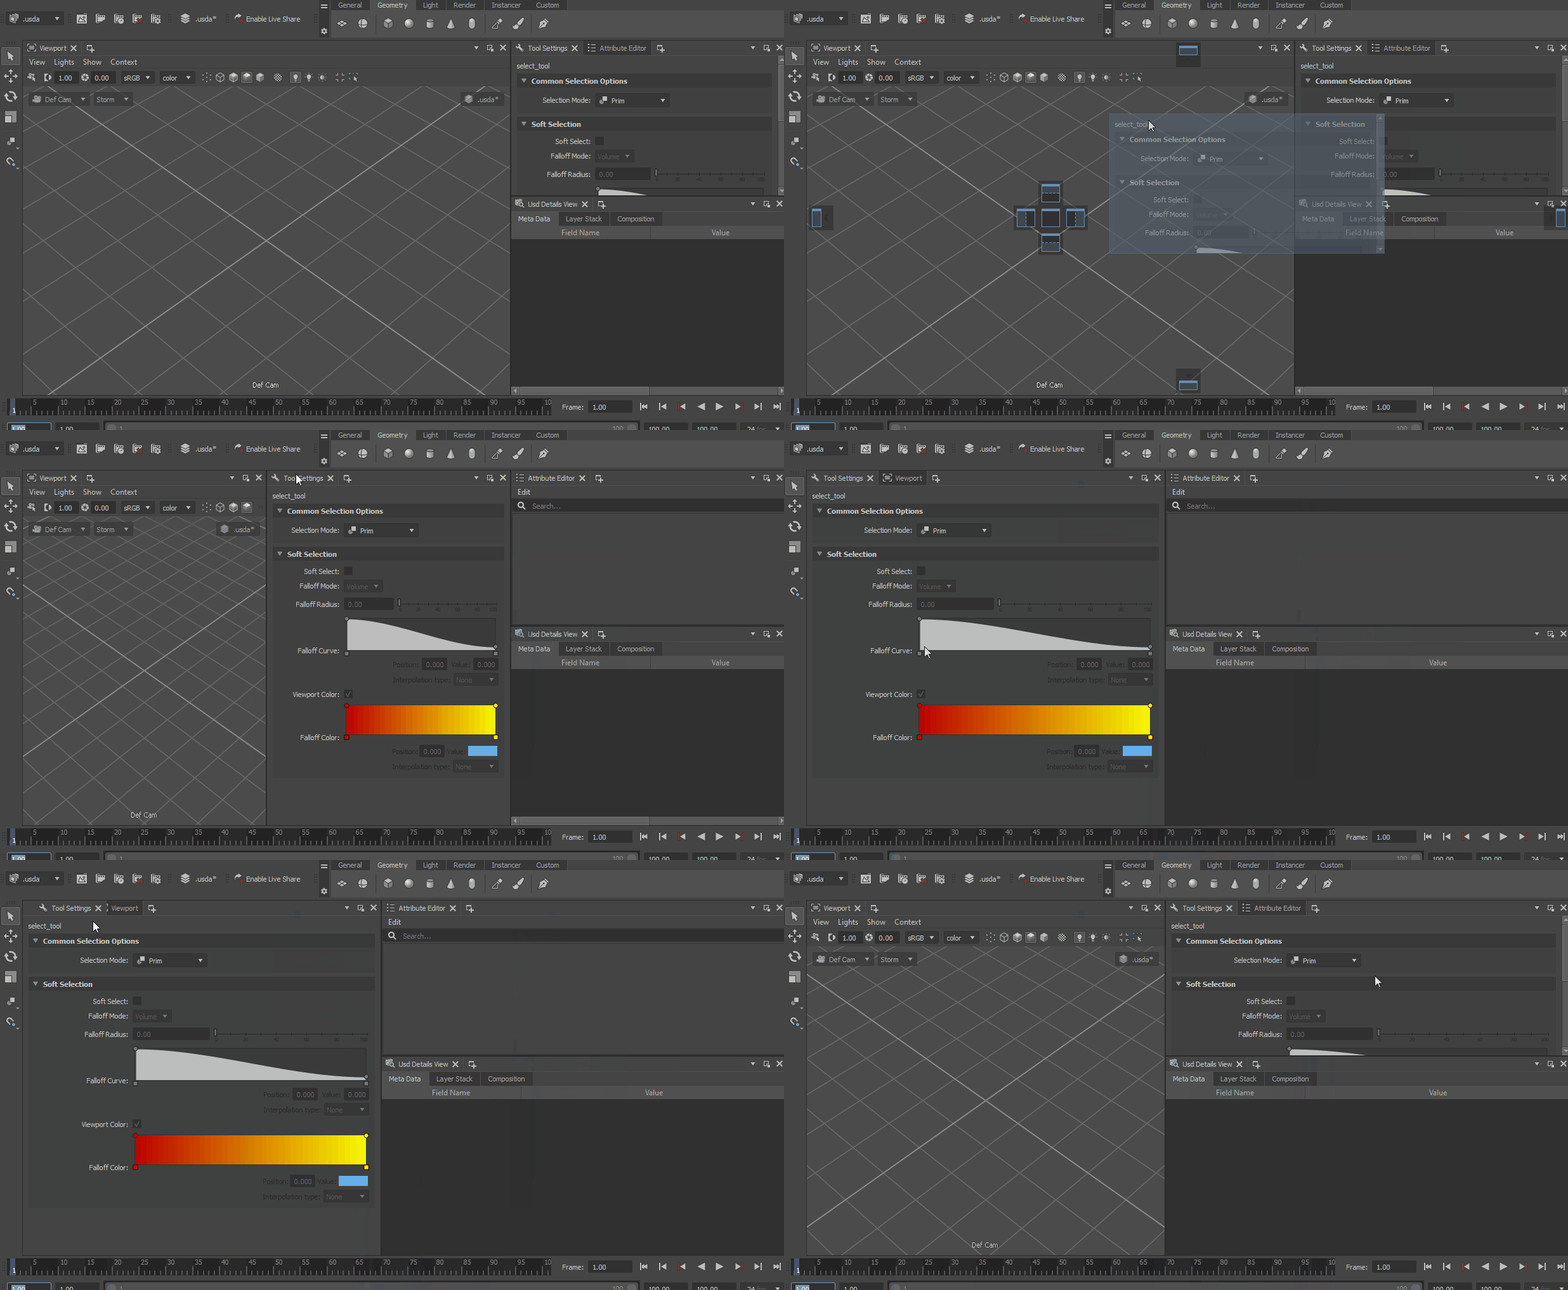
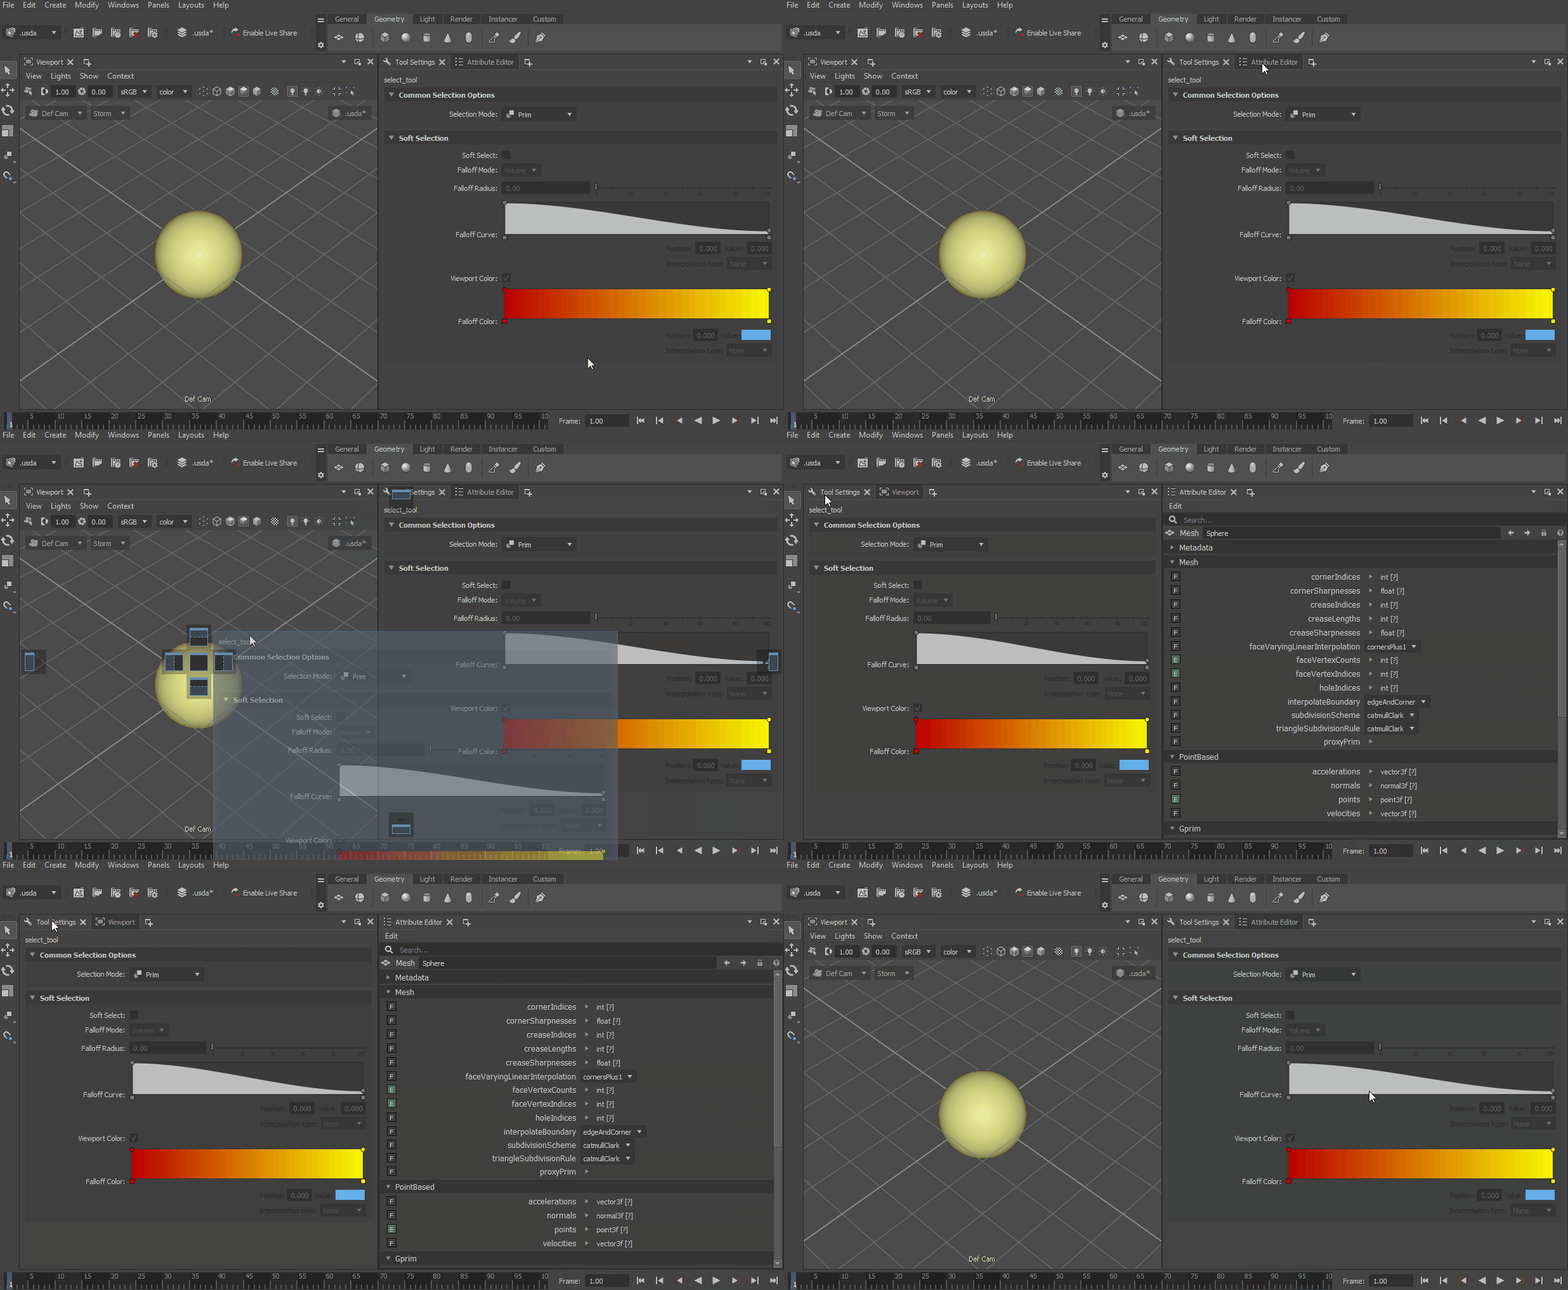
Docking Icons: Docking icons appear when you drag a panel. Drop the panel onto an icon to split the workspace into multiple sections.
Resize: Panels can be resized by dragging their edges.
Detach: Drag a panel’s tab outside of the docking icons and tab headers to detach it as a separate window.
Hide: Click the
 icon next to a panel’s title bar to hide it.
Your layout is automatically saved when you close the program.
Tab Grouping
Group multiple tabs within a single workspace to efficiently manage your work.
Click on the desired tab to switch between them. The tab group will retain its size and position. The images below illustrate different docking configurations and tab grouping:

Adding Tabs to a Group:
New Panel Menu: Click the
 icon and select the desired panel from the menu.
Dragging: Drag an open panel’s tab onto the tab bar of another panel to add it to the group.
Layouts
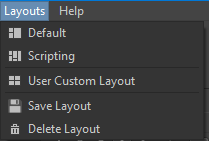
You also can reorganize the panels using the pre-defined layouts. It includes a set of the default layouts, moreover, the user can save custom layouts and load them as required.

The layout can be loaded using the Layouts menu in the top-bar.
- To add a custom layout:
Organize the workspace as desired;
Select the Save Layout in the Layouts menu;
Assign a name for the custom layout and click the Save button;
The custom layout will be displayed in the list of the available layouts.
The current layout is saved before closing the program. Thus, the panels, their position and proportions will be used on the next start-up.