Viewport
The Viewport panel is a graphical user interface which displays a interactive representation of a 3D scene. It provides ability to preview and interact with the 3D scenes for a wide range of tasks such as viewing, manipulating and modifying the objects.
The Viewport panel consists of the following elements:
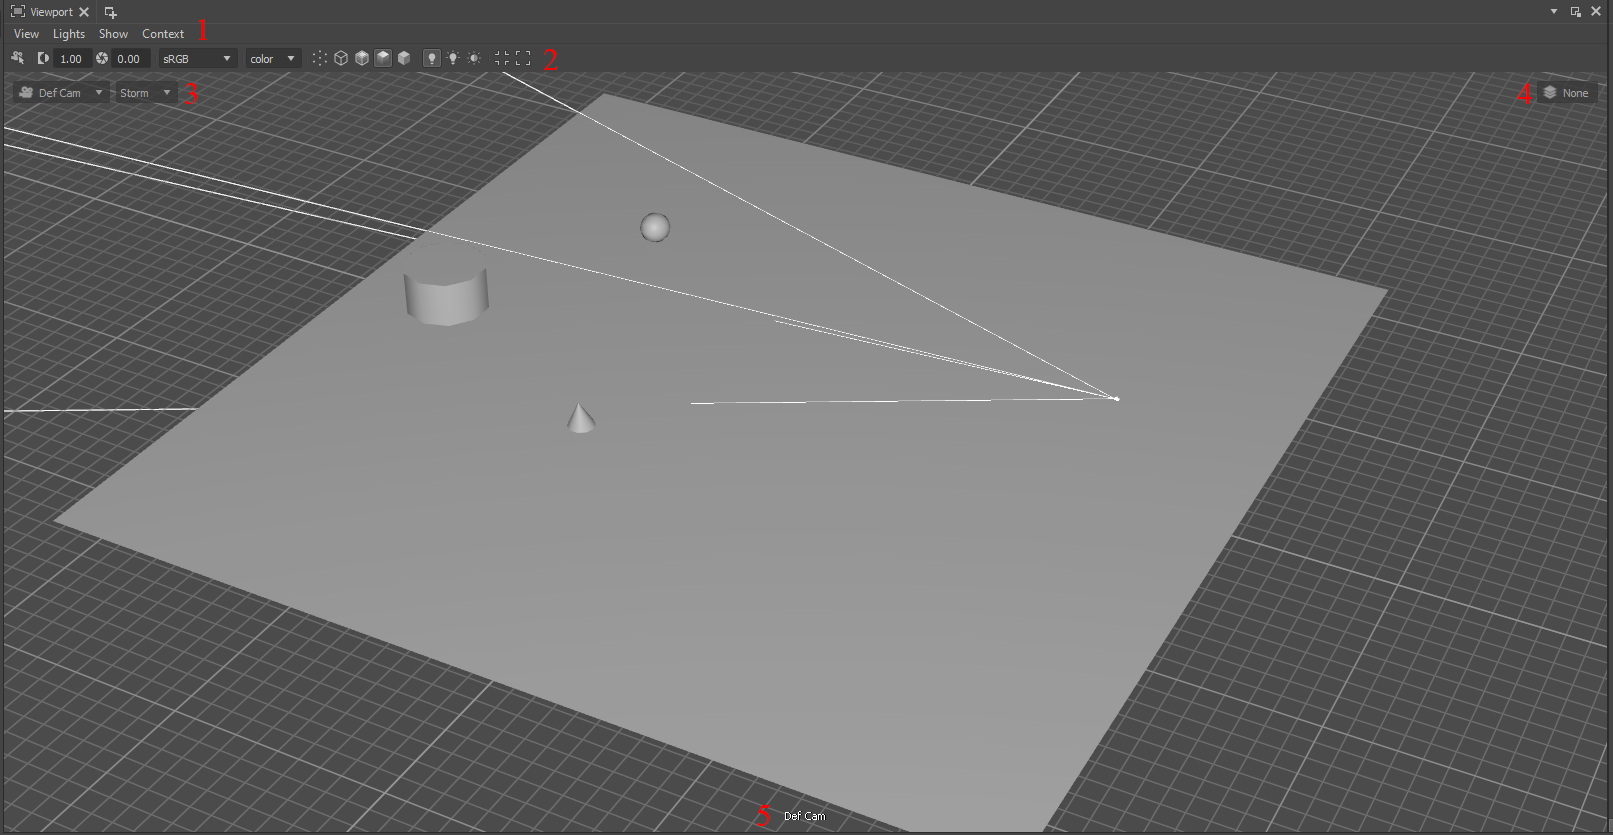
Number |
Description |
|---|---|
1 |
Viewport menu-bar |
2 |
Display parameters quick menu |
3 |
Switch camera and render delegate |
4 |
Edit Target (Layer) |
5 |
Current Camera’s name |
Managing the View
Render Region
The Render Region allows you to render a specific portion of your scene at full resolution. This is useful in high-load scenes for efficiently making adjustments to specific areas of interest.
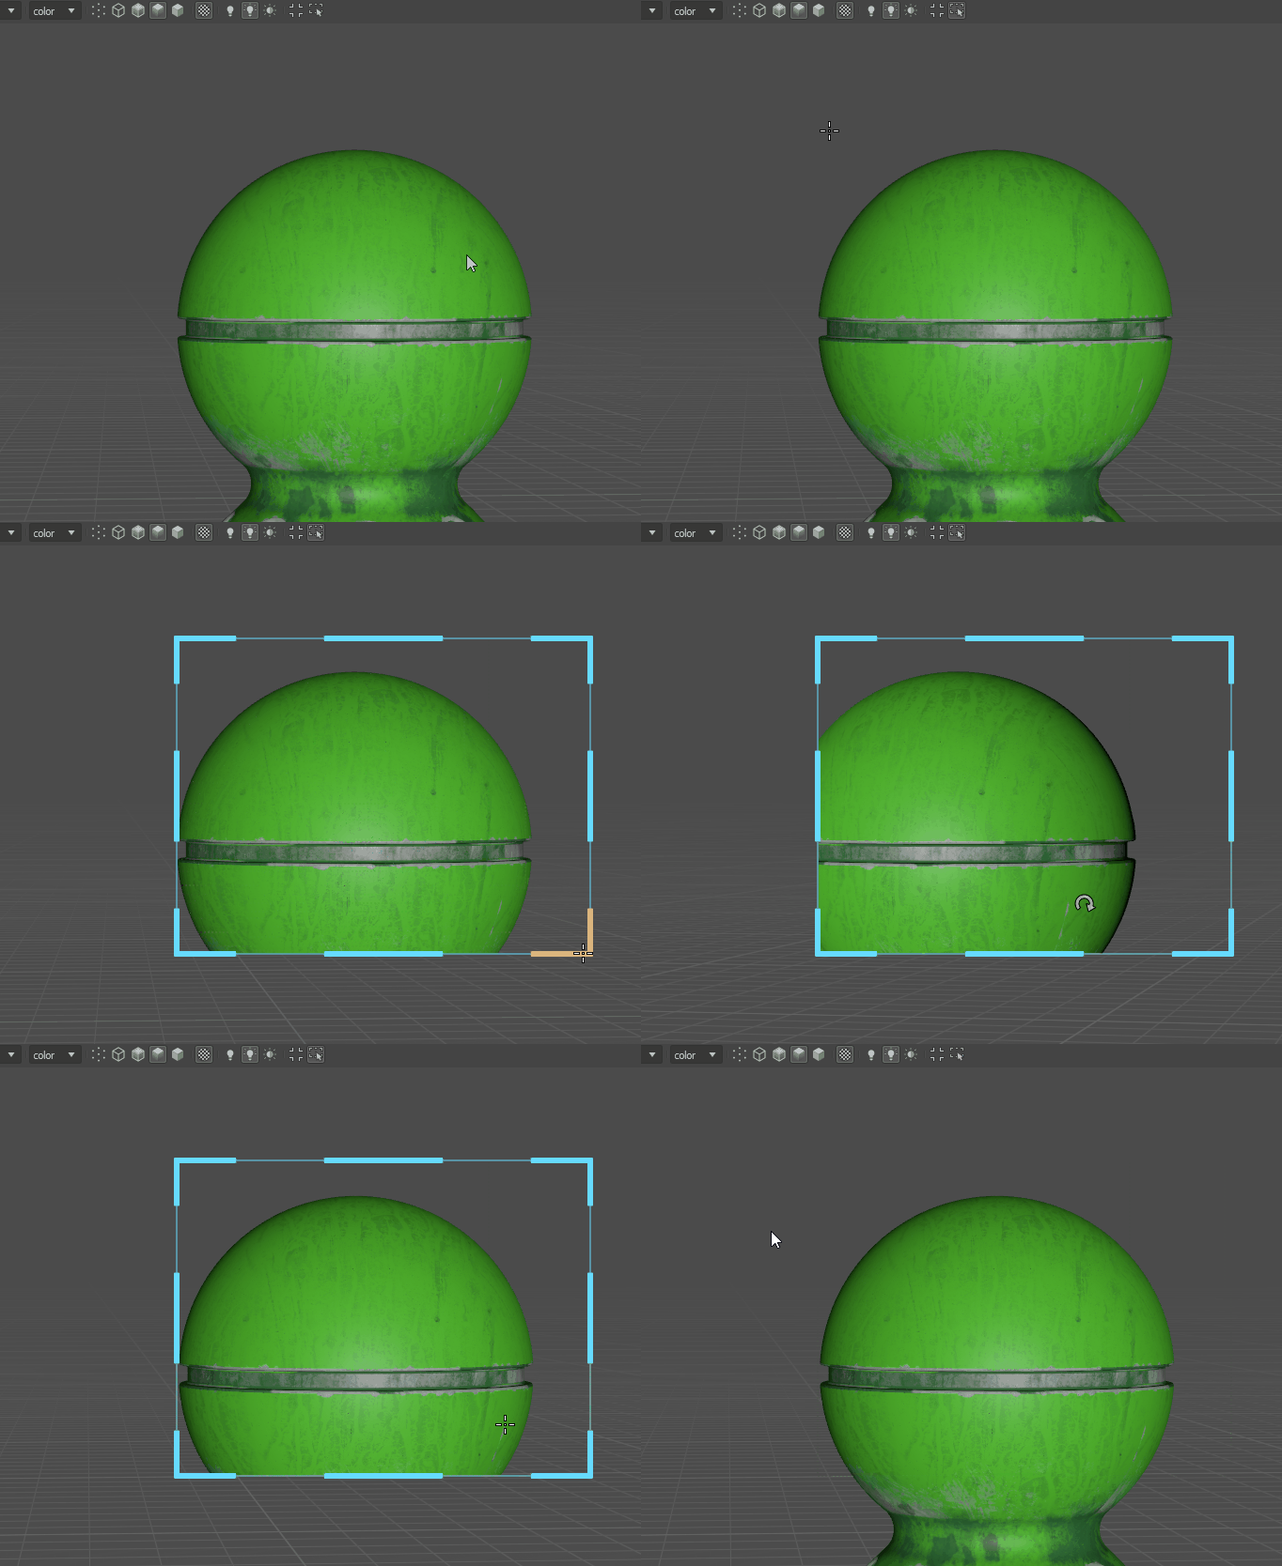
This will render only the selected area at full resolution, allowing you to quickly preview and refine your work.
Viewport preferences
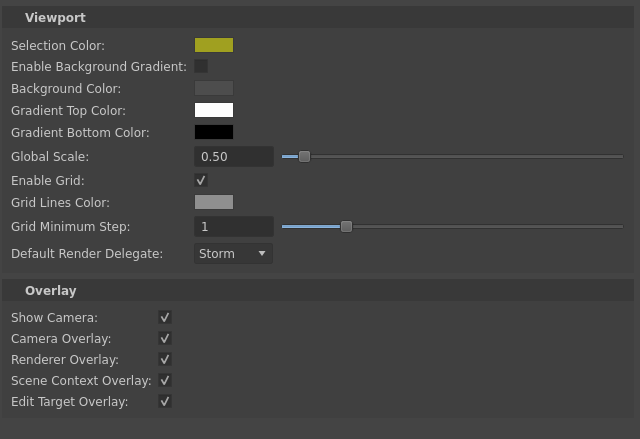
The functions listed in the Windows>Preferences>Viewport menu in the top-bar allow to configure Viewport’s selection and background colors, grid size, default render delegate, overlay preferences etc.
Viewport Render Properties
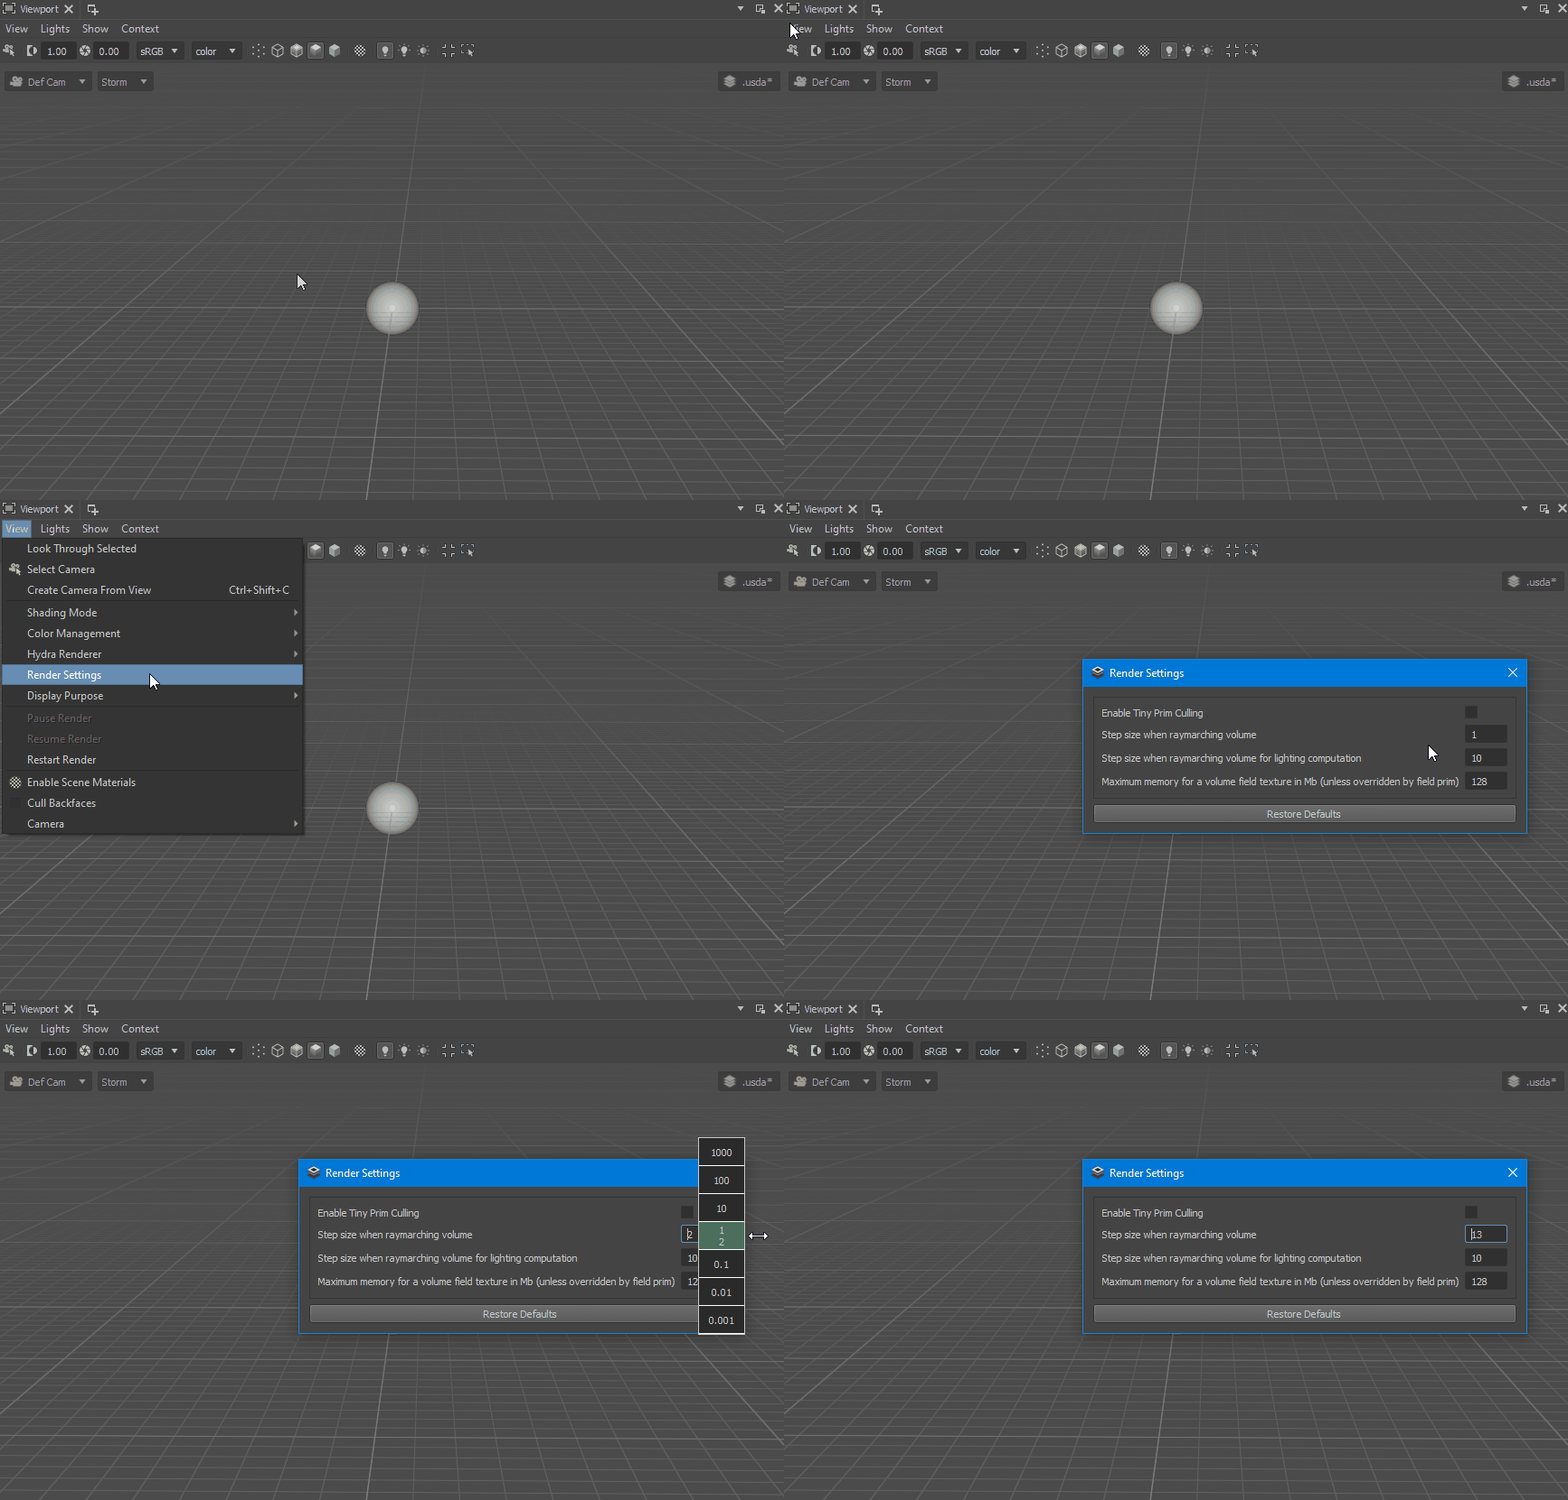
The Viewport display properties can be configured using the Render Settings improved UI (View>Render Settings). This menu includes the Hydra renderer attributes presented in the current scene. The numeric attributes can be configured using the Ladder Widget
OCIO
The Hydra Viewport allows to manage the color preferences using the OpenColorIO library. It allows to have the consistent results in the multiple applications.

The OCIO configuration can be modified using OCIO var or using the Preferences menu.

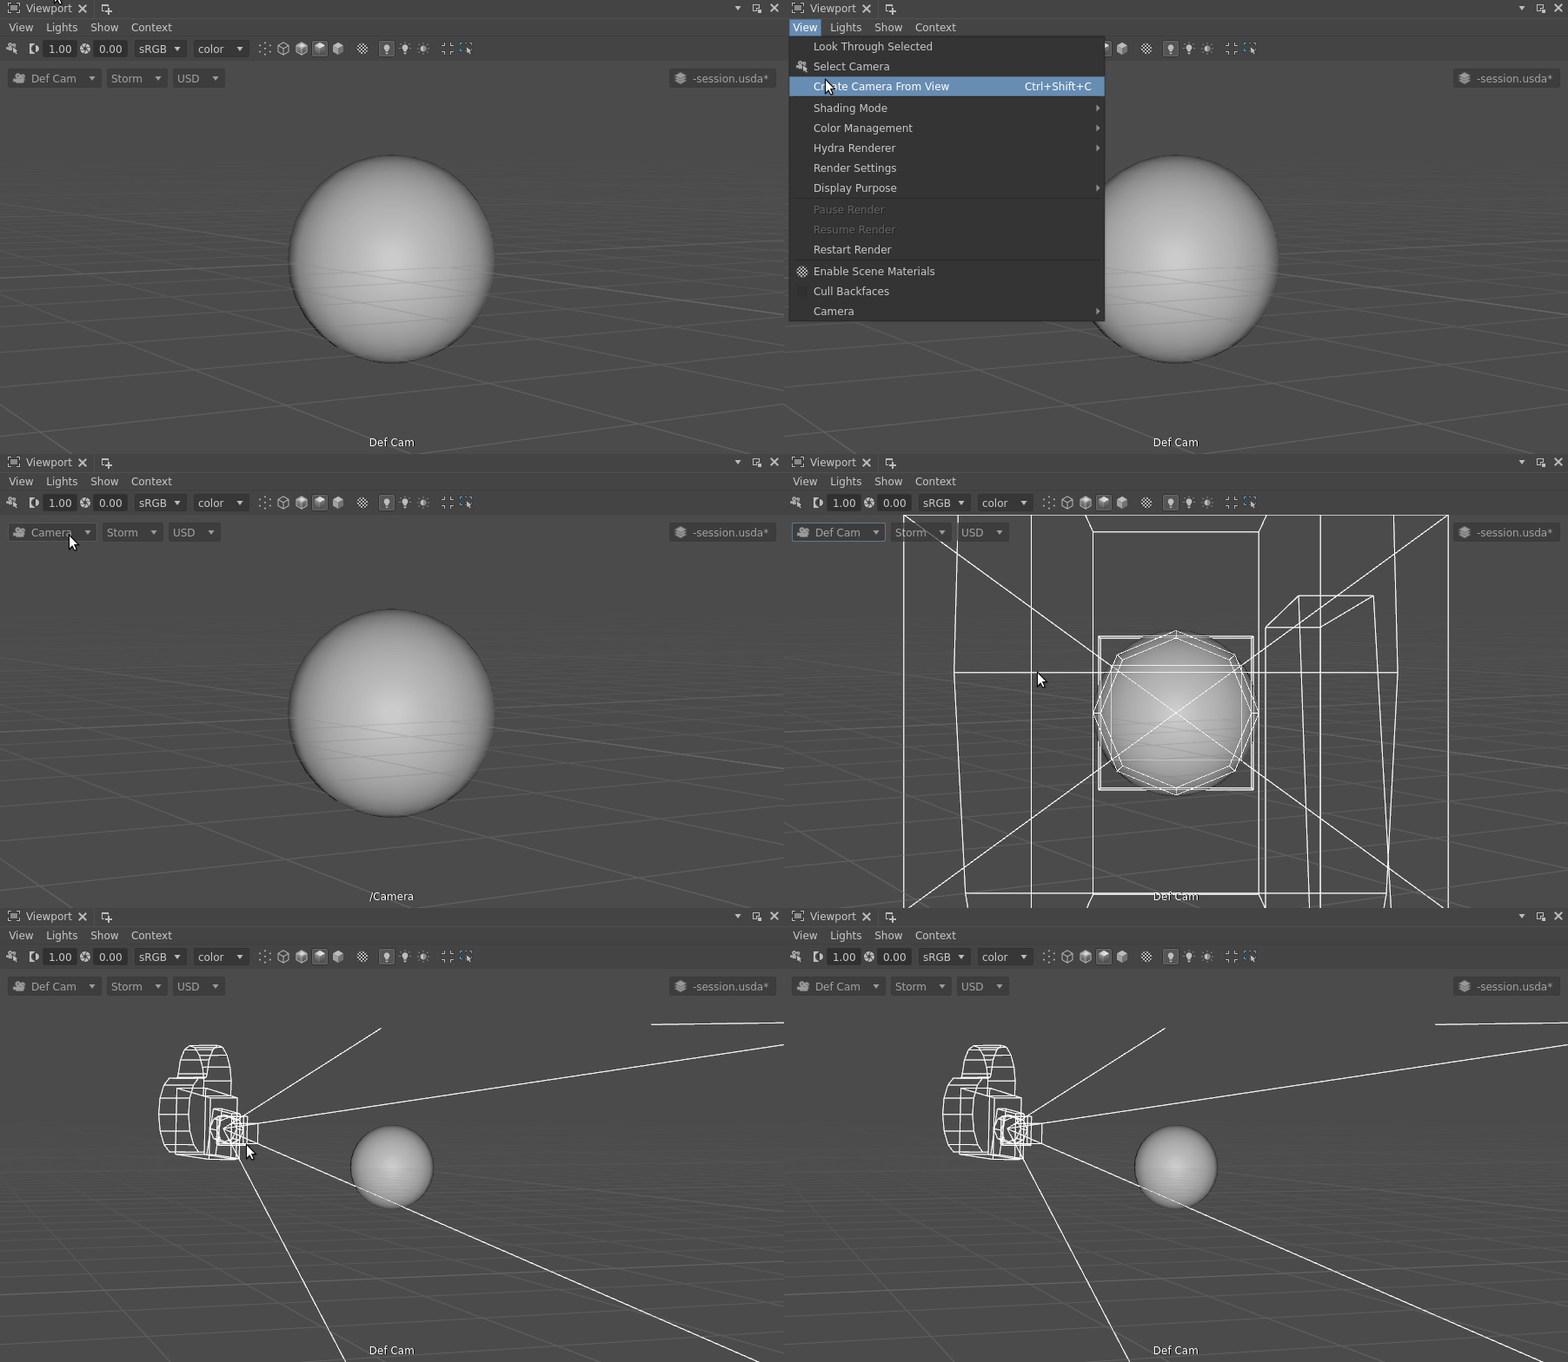
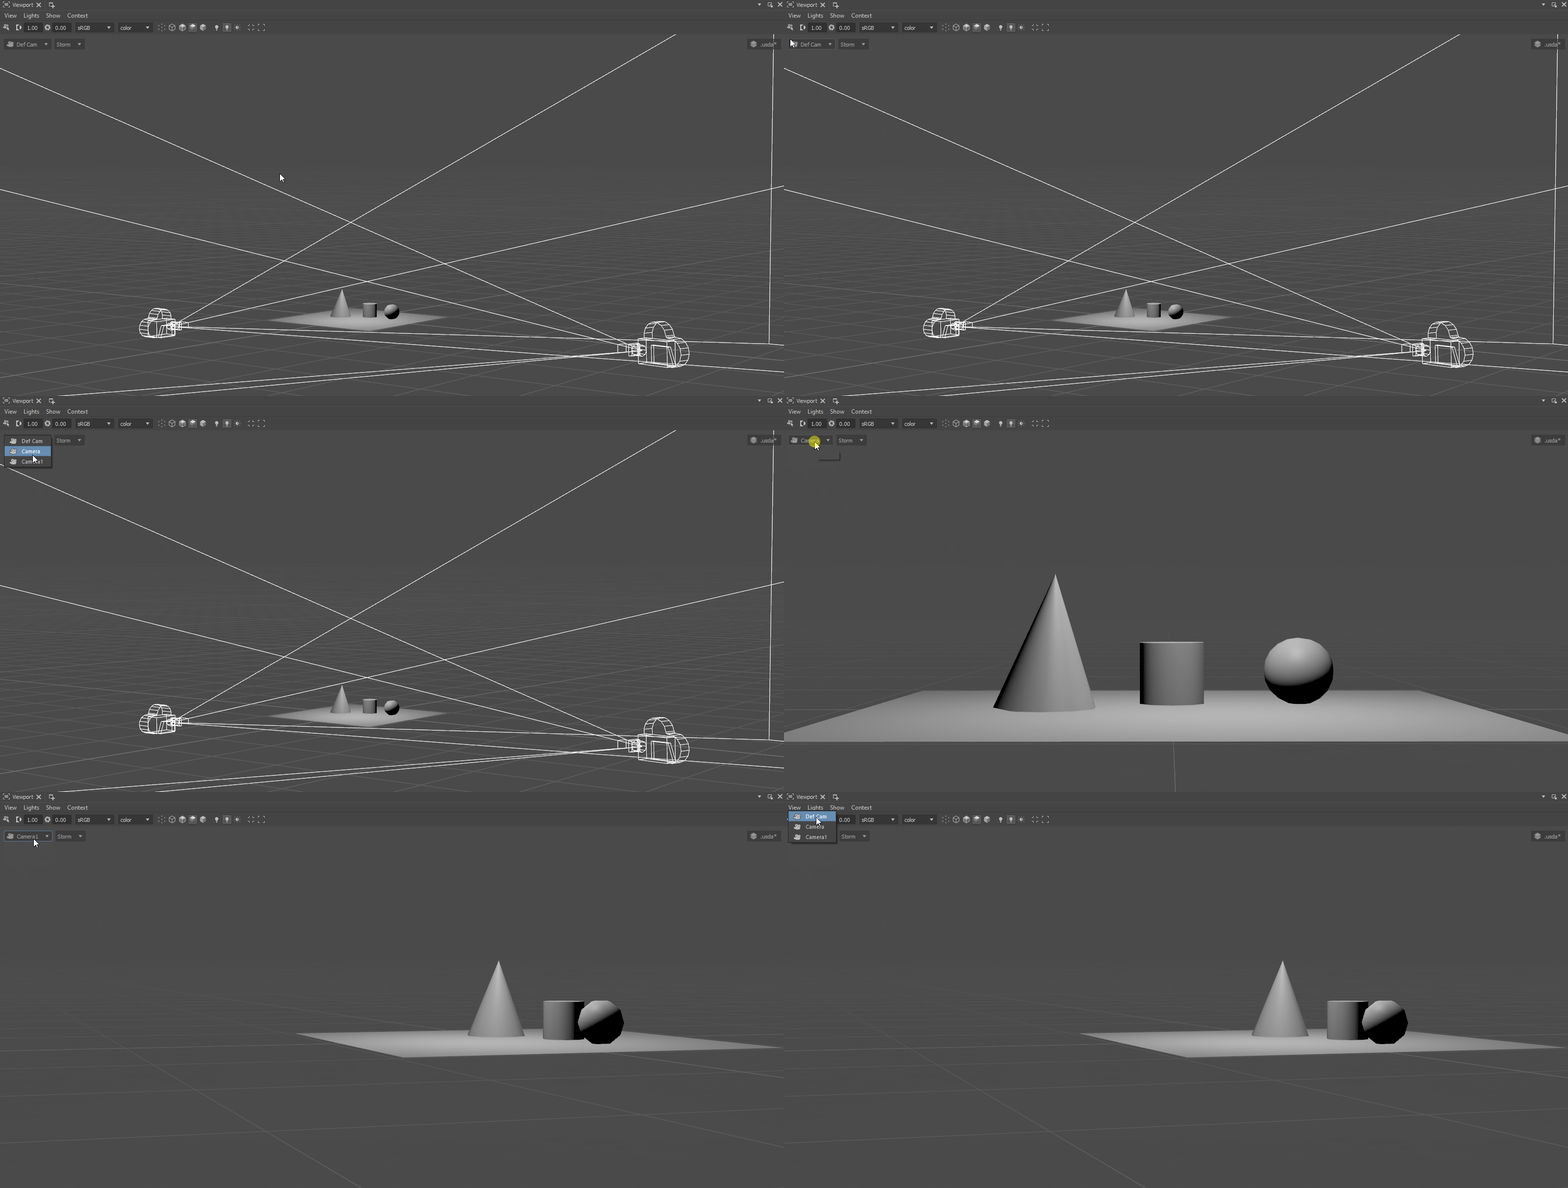
 Select Camera
 Points - displays only vertices of the objects.
 Wireframe - displays only edges (wireframes) of the objects.
 Wireframe on Surface - displays edges (wireframes) over the surface of the objects.
 Shaded Smooth - displays objects using smoothed shadows and the base colors.
 Shaded Flat - displays objects using flat colors.
 Enable Scene Materials
 Use Default Lighting
 Use All Lights
 Enable Shadows